Just buying a Video Wall does not solve the problem to have an application which is able to present helpful content on the monitors. There are a lot of options which also bring a lot of functions, but in general we need just the possibility to display different Web Pages and optimize them a little bit. In this part we will share how to build your own basic app.
In this blog series we (Christoph Düggeli and Thomas Kurth) will share their experience and technical solutions for a professional and helpful SOC Wall. Credits also to Athiraiyan who was involved in the initial phase.
Link to other Parts:
- Planning the Setup
- Develop your Video Wall Application
- Build your Content (Link will follow)
Setup Development Environment
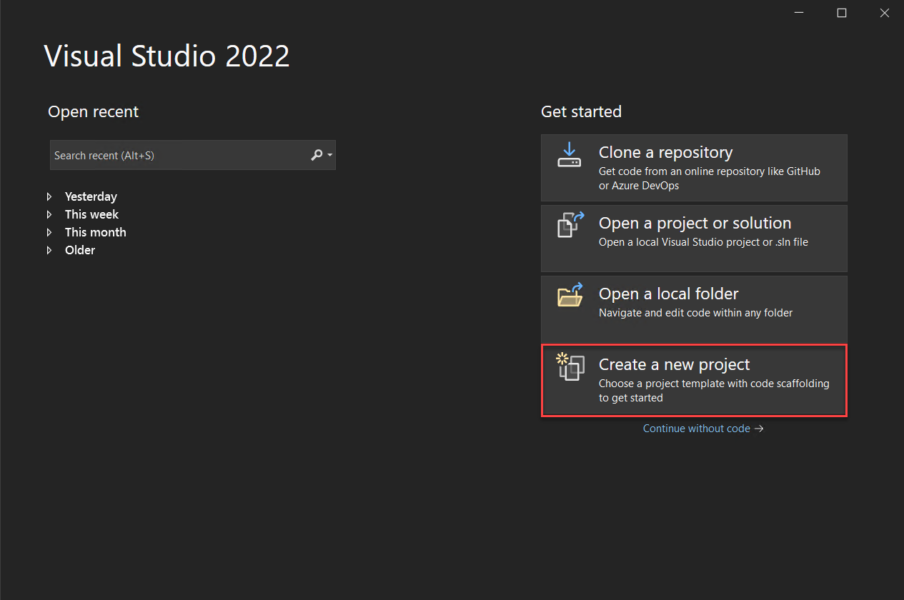
To build a video wall app I recommend installing the latest available Visual Studio version. In my case I setup a new project in 2022.
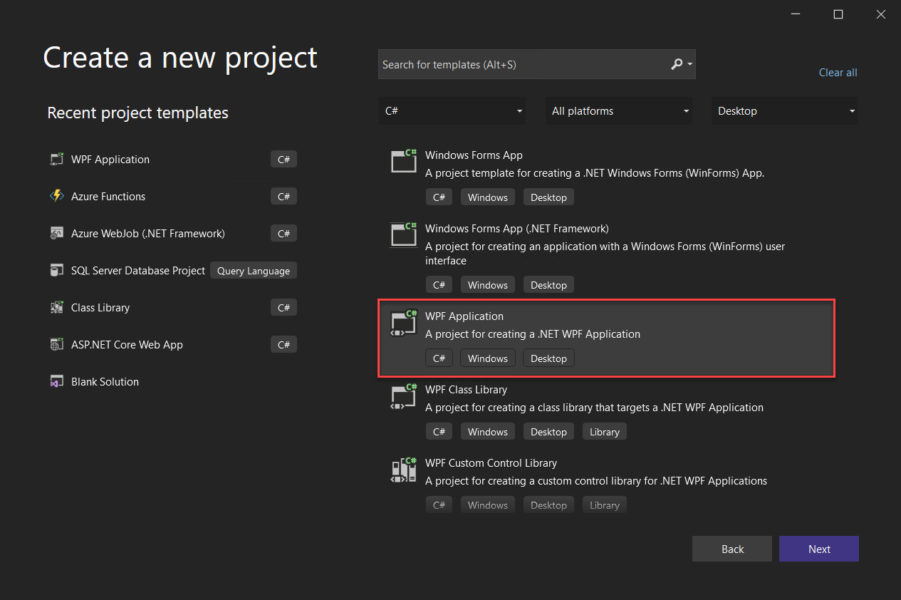
In the wizard I choose a “WPF application” as project type and .NET 6.0 as framework which allows us to build a flexible and simple app. The name of the project is completely your choice.
The initial project structure already contains most files which we require at the end. We can already improve our main window (MainWindow.xaml) and add the following configurations in the Windows Tag:
- WindowStyle=”None”
- WindowState=”Maximized”
- Height=”1080″
- Width=”7680″
The height and width is not really important as it is mainly used in the designer because we also specify that the window will be maximized.
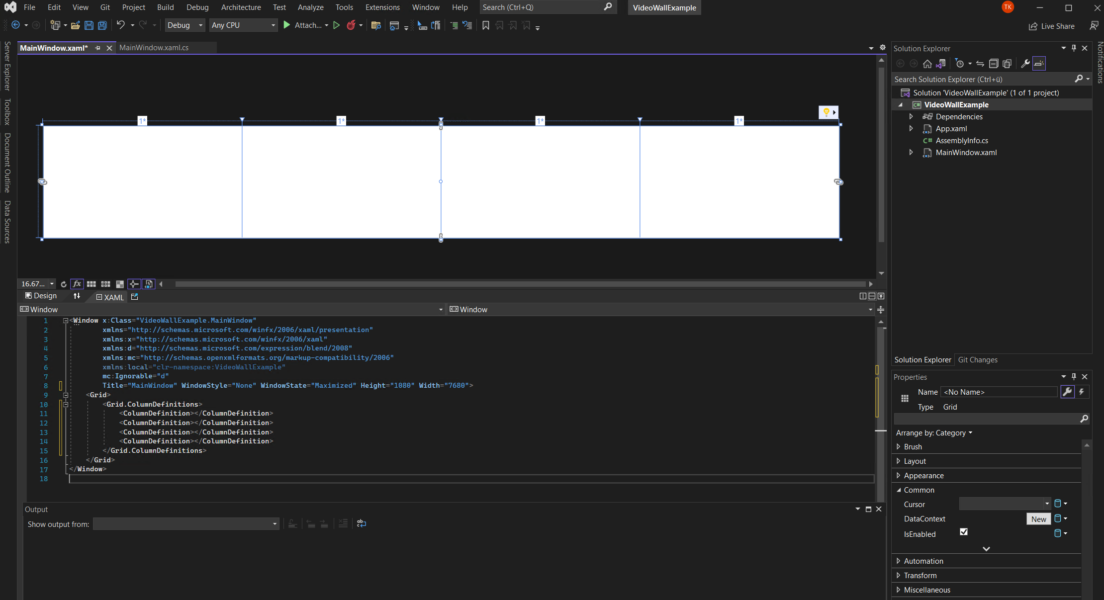
The next step is to define a grid which should match the monitor borders. Therefore, we define 4 columns where all of them have the same width. The resulting xaml code looks like that:
<Window x:Class="VideoWallExample.MainWindow"
        xmlns="http://schemas.microsoft.com/winfx/2006/xaml/presentation"
        xmlns:x="http://schemas.microsoft.com/winfx/2006/xaml"
        xmlns:d="http://schemas.microsoft.com/expression/blend/2008"
        xmlns:mc="http://schemas.openxmlformats.org/markup-compatibility/2006"
        xmlns:local="clr-namespace:VideoWallExample"
        mc:Ignorable="d"
        Title="MainWindow" WindowStyle="None" WindowState="Maximized" Height="1080" Width="7680">
    <Grid>
        <Grid.ColumnDefinitions>
            <ColumnDefinition></ColumnDefinition>
            <ColumnDefinition></ColumnDefinition>
            <ColumnDefinition></ColumnDefinition>
            <ColumnDefinition></ColumnDefinition>
        </Grid.ColumnDefinitions>
    </Grid>
</Window>
As you can see in the the window is now split in 4 areas.
Implement WebView2
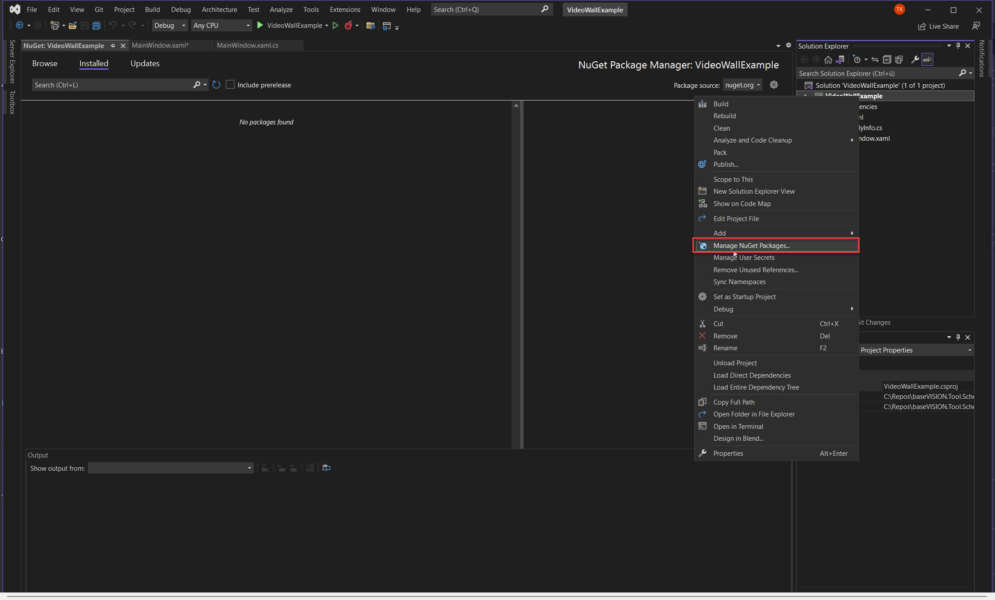
The built-in browser control is simple to use but is based on the Internet Explorer Engine. To use the Edge Chromium based replacement we have to use the WebView2 control which is available as Nuget package. In Solution Explorer, right-click the project name, and then select Manage NuGet Packages.
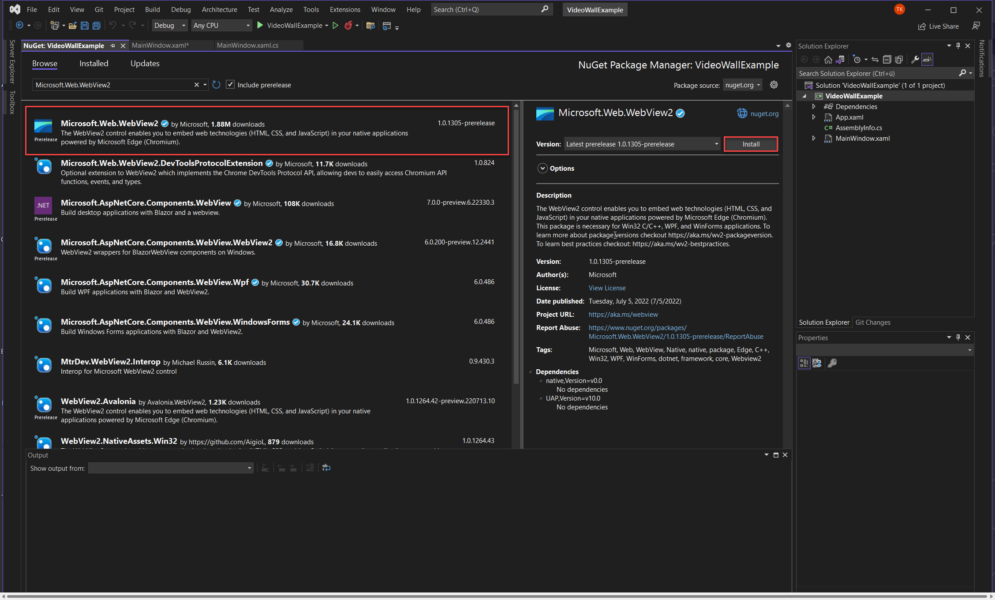
In the upper left, click the Browse tab. In the search bar, type “Microsoft.Web.WebView2”, then click the Microsoft.Web.WebView2 card.
The NuGet package manager dialog box displays search results, including a Microsoft.Web.WebView2 card. The dialog box has a version number and Install button.
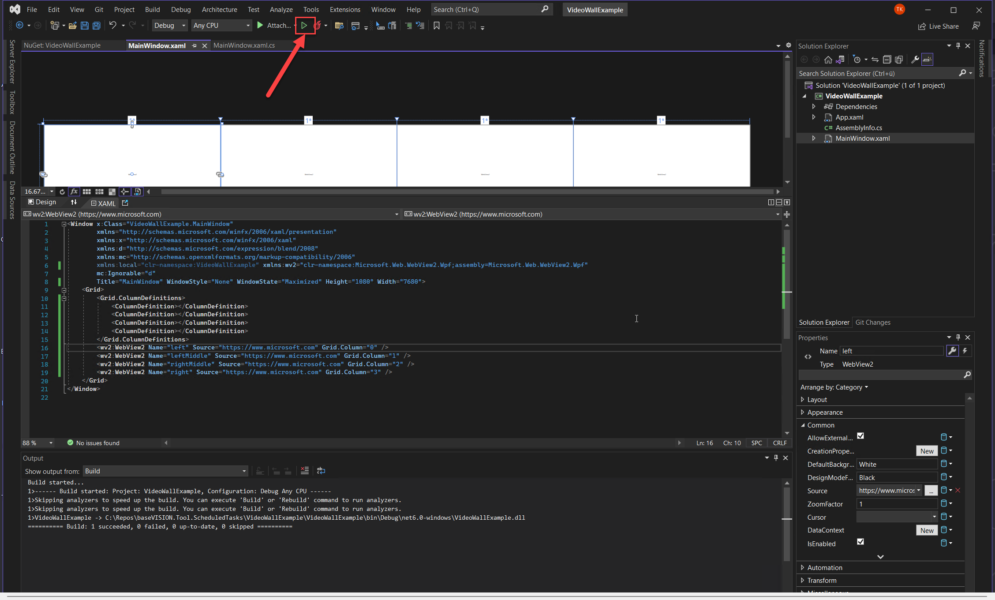
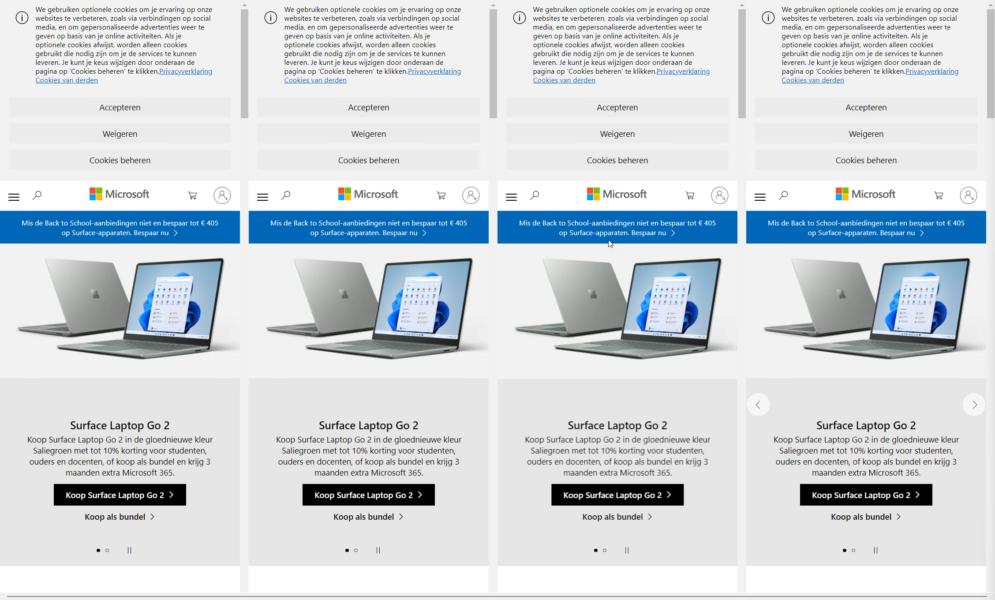
As soon the package is installed successfully, we can go back to the MainWindow.xaml and add the new controls including the urls which we would like to display:
<Window x:Class="VideoWallExample.MainWindow"
        xmlns="http://schemas.microsoft.com/winfx/2006/xaml/presentation"
        xmlns:x="http://schemas.microsoft.com/winfx/2006/xaml"
        xmlns:d="http://schemas.microsoft.com/expression/blend/2008"
        xmlns:mc="http://schemas.openxmlformats.org/markup-compatibility/2006"
        xmlns:local="clr-namespace:VideoWallExample" xmlns:wv2="clr-namespace:Microsoft.Web.WebView2.Wpf;assembly=Microsoft.Web.WebView2.Wpf"
        mc:Ignorable="d"
        Title="MainWindow" WindowStyle="None" WindowState="Maximized" Height="1080" Width="7680">
    <Grid>
        <Grid.ColumnDefinitions>
            <ColumnDefinition></ColumnDefinition>
            <ColumnDefinition></ColumnDefinition>
            <ColumnDefinition></ColumnDefinition>
            <ColumnDefinition></ColumnDefinition>
        </Grid.ColumnDefinitions>
        <wv2:WebView2 Name="left" Source="https://www.microsoft.com" Grid.Column="0" />
        <wv2:WebView2 Name="leftMiddle" Source="https://www.microsoft.com" Grid.Column="1" />
        <wv2:WebView2 Name="rightMiddle" Source="https://www.microsoft.com" Grid.Column="2" />
        <wv2:WebView2 Name="right" Source="https://www.microsoft.com" Grid.Column="3" />
    </Grid>
</Window>Tuning our app – Fullscreen in Microsoft Sentinel Workbooks
Now, we have some special requirements as we are displaying Workbooks from Sentinel. By default, when specifying the URL they are not displayed in full screen and therefore the Azure Navigation elements are taking a lot of space on the monitors. This can be done by executing a JavaScript as soon a page is loaded in a WebView2 control. For this we open the MainWindow.xaml.cs file in the solution explorer and add a new function to it:
private void enableFullScreenAzure(object sender, CoreWebView2DOMContentLoadedEventArgs e)
{
      ((CoreWebView2)sender).ExecuteScriptAsync("document.body.classList.add('fxs-portal-fullscreen')");
}
The defined JavaScript will add a specific CSS class to the body tag in Html. The same is done when pressing the full screen button in the Azure Portal. Just defining the function is not enough, we also need to define when it will be executed. This is in our case an event which is triggered as soon the DOM main page is loaded.
public MainWindow()
        {
            InitializeComponent();
            InitializeBrowser();
        }
        public async void InitializeBrowser()
        {
            await left.EnsureCoreWebView2Async(null);
            await leftMiddle.EnsureCoreWebView2Async(null);
            await rightMiddle.EnsureCoreWebView2Async(null);
            await right.EnsureCoreWebView2Async(null);
            left.CoreWebView2.DOMContentLoaded += enableFullScreenAzure;
            leftMiddle.CoreWebView2.DOMContentLoaded += enableFullScreenAzure;
            rightMiddle.CoreWebView2.DOMContentLoaded += enableFullScreenAzure;
            right.CoreWebView2.DOMContentLoaded += enableFullScreenAzure;
        }
Tuning our app – Zoom
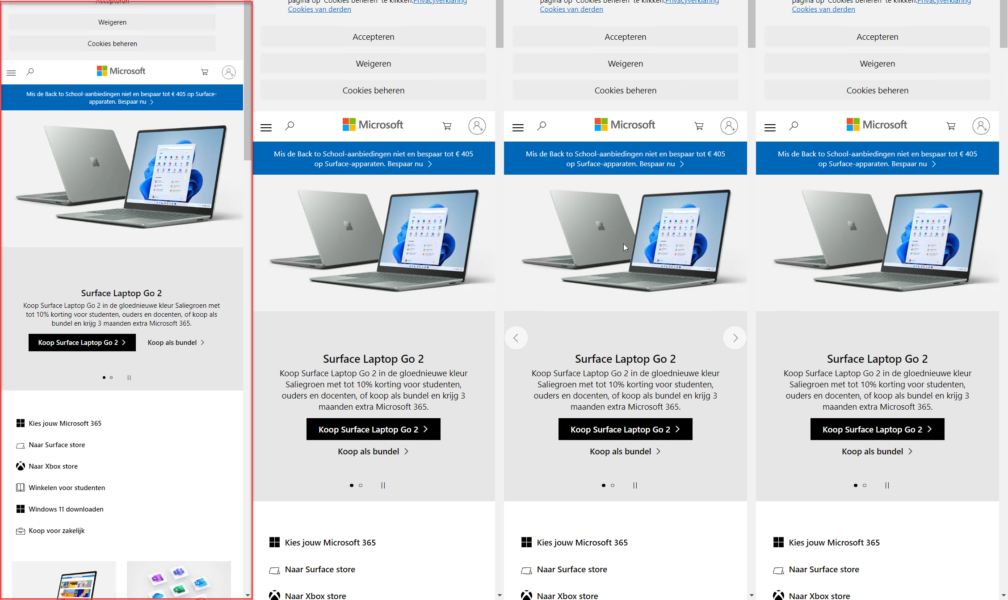
As soon you have first workbooks on the screen you will realize that some of them are too big or too small. With the help of the browser zoom we can adjust this. You can add the ZoomFactor=”0.80″ to specify 80% for a single control:
<wv2:WebView2 Name="left" Source="https://www.microsoft.com" Grid.Column="0" ZoomFactor="0.80" />The first column is now zoomed to 80%:
Summary
In this post you have seen how simple it is to build your own video wall application and customize the content. Your imagination is the limit, you can also build your own controls and add charts from various other sources not just browser windows. In the next blog part we will show how to design and build the Microsoft Sentinel Workbooks with useful information.
- Microsoft Sentinel ASIM Parser demystified - March 31, 2024
- Enhancing Network Security Insights with IDS/IPS of Ubiquiti Dream Machine Pro and Microsoft Sentinel - March 10, 2024
- Ubiquiti Dream Machine Pro Logs to Microsoft Sentinel - February 6, 2024



0 Comments