In part three of this post series, we will create the ConfigMgr Settings Item to generate new passwords on the devices on a regular schedule. It is also possible to run the PowerShell script with a scheduled task, but for now I will show the implementation with ConfigMgr.
Part 1 – Background Information
Part 2 – Solution Overview and installing netECM:MiniWebservice
Part 3 – Creating ConfigMgr Compliance Settings Item (This Post)
Part 4 – Retrieve the passwords with PowerShell
Prerequisites
First we need a new Private/Public key pair. You can generate them with the following script:
$KeyLength = 2048 # Valid Values are 1024, 2048, 4096
$RSAPROV = New-Object -TypeName 'System.Security.Cryptography.RSACryptoServiceProvider' -ArgumentList $KeyLength
Write-Host "Public Key:" -ForegroundColor Red
$RSAPROV.ToXmlString($false)
Write-Host "Public and Private Key:" -ForegroundColor Red
$RSAPROV.ToXmlString($true)
You can change the key length, but 2048 should be enough for the moment. We will need the generated strings later in our scripts so let this console open or save the keys to your local password safe.
Script Flow Chart
The following diagram will illustrate the actions of the PowerShell script which is implemented in the compliance settings item.
Create ConfigMgr Configuration Item
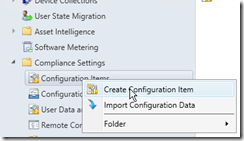 |
Start the ConfigMgr Console and create a configuration item under compliance settings. |
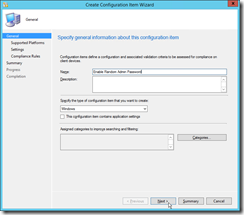 |
Define a name of the configuration item. I choose “Enable Random Admin Password” as name. Then click next. |
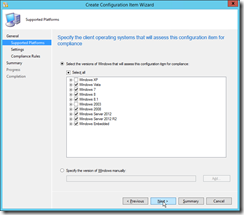 |
On this page you can restrict the item to specific operating systems. Disable Windows XP and Server 2003, because the script is not tested there. |
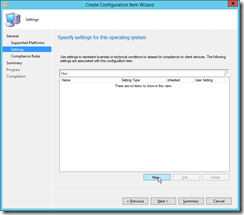 |
Create a new Setting. |
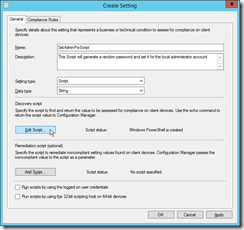 |
The name can be “SetAdminPassword” and the description is optional. As setting type you have to choose Script and Date Type should be String. Then click on Edit Script in the Discovery script section. |
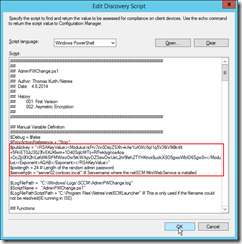 |
As script language choose Windows PowerShell and paste this script to the editor window.
IMPORTANT: |
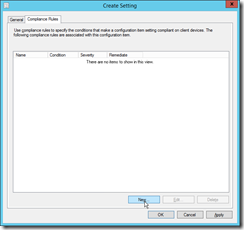 |
Then jump to the Compliance Rules register and add a new rule. |
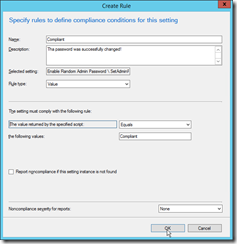 |
Define the compliance rule as specified in the screenshot. |
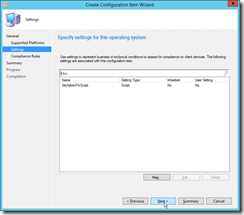 |
Next… |
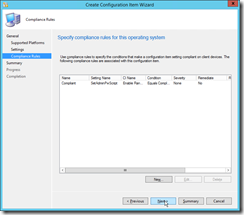 |
Next…Next…OK |
Create ConfigMgr Configuration Baseline
To deploy the configuration item, we have to create a baseline first.
 |
Start the Create Configuration Baseline wizard. |
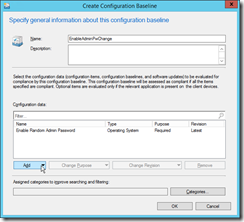 |
Add your newly created configuration item and set a name for the configuration baseline.
Then close the wizard with a press on ok. |
Deploy Baseline to Devices
The next step is to deploy the baseline to devices. You can right click on the baseline and click deploy.
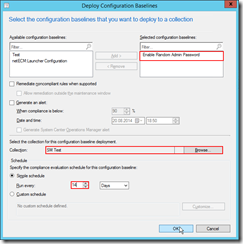 |
The baseline should already be added. So you only have to choose the correct collection and the interval of the password change. In my environment I change the password every 14 days. |
Check the Complinace on a device
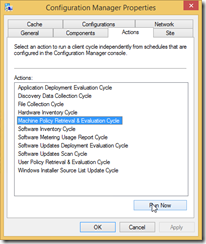
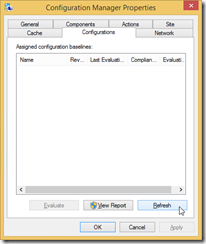
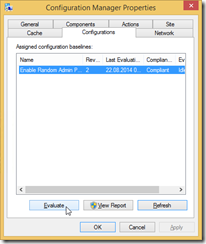
Now we would like to check the status on a device, which is in the collection we choosed in the last step.
Check the result in MiniWebService
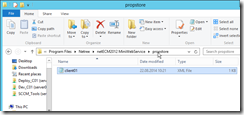 Now the encrypted password is saved in the netECM:MiniWebService property store. Navigate to the installation directory and open the propstore folder. There you will find a file for each device, which has reported a password back.
Part 4 will explain how you can get the passwords back from and use them.
- Microsoft Sentinel ASIM Parser demystified - March 31, 2024
- Enhancing Network Security Insights with IDS/IPS of Ubiquiti Dream Machine Pro and Microsoft Sentinel - March 10, 2024
- Ubiquiti Dream Machine Pro Logs to Microsoft Sentinel - February 6, 2024



1 Comment
Important Feature Change: Password change with GPO’s no longer possible KB2962486/KB2928120/KB2961899 – Part 2 - Workplace Management Blog · February 12, 2016 at 13:13
[…] Part 3 – Creating ConfigMgr Settings Item […]