
Like all companies we at baseVISION need to protect personal data of our employees we save. In our company we have strict rules what we do with it and only save if we really need it. Office 365 has a lot of features to detect such high confidential data. One is Office 365 DLP which can inform me if sensitive data is for example shared with external people. This functionality I would like to use to get an information when somebody shares documents with social id’s, especially the swiss social id (AHV/AVS number). That one is not available as a predefined sensitivity type and my experiences can be beneficial for you.
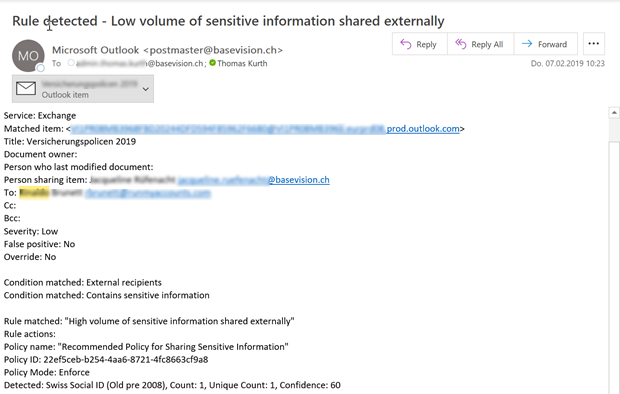
To mention is, that already two days after my implementation I got the first alert e-mail, but luckily it was an allowed sharing.
In this blog I will show you how to set this up in your tenant.
How the swiss social id looks like
In this table you see an example and a regex pattern to detect it.
| Switzerland | AVS | Old AVS format with personal data encoded |
[0-9]{3}\.?[0-9]{2}\.?[0-9]{3}\.?[0-9]{3} | 324.65.242.000 |
| Switzerland | AVS 2008 | New AVS format (16 digits with constant prefix 756, which is ISO 3166-1 country code) |
756\.?[0-9]{4}\.?[0-9]{4}\.?[0-9]{2} | 756.5152.7017.84 |
You can find the same information for other countries in the following blog: https://ipsec.pl/data-protection/2012/european-personal-data-regexp-patterns.html
Create the sensitive info types
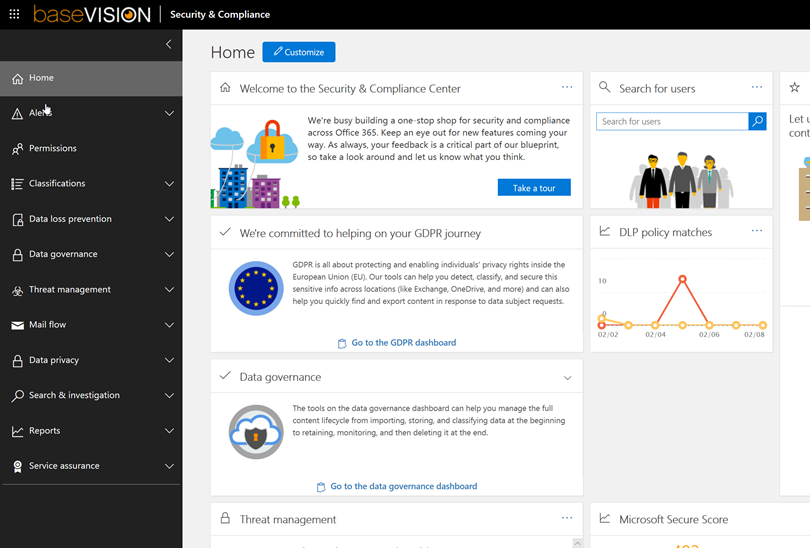 |
Open the Security and Compliance Dashboard |
 |
And click on classifications à Sensitive info types à Create
You will have to do this twice because we will need to create to types. |
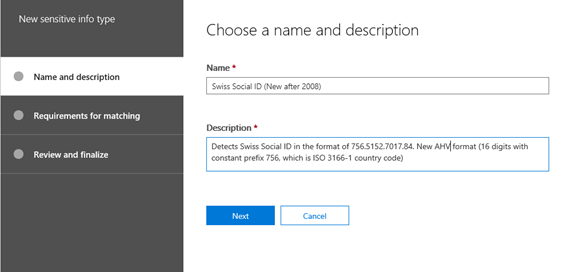 |
Specify a name and description
Type 1 Name: Swiss Social ID (New after 2018) Description: Detects Swiss Social ID in the format of 756.5152.7017.84. New AHV format (16 digits with constant prefix 756, which is ISO 3166-1 country code). Type 2 Name: Swiss Social ID (Old pre 2018) Description: Detects Swiss Social ID in the format of 324.65.242.000. Old AVS format with personal data encoded. |
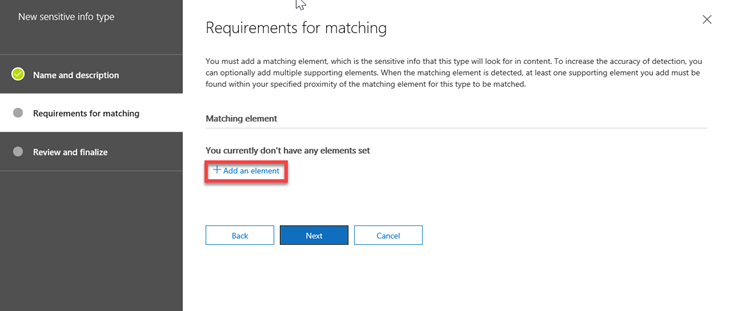 |
Add a new matching element |
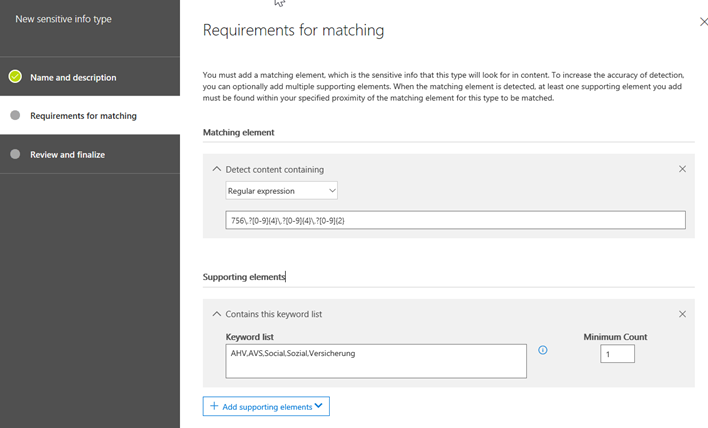 |
Specify the matching element of type regular expression
Type 1 Regular expression: 756\.?[0-9]{4}\.?[0-9]{4}\.?[0-9]{2} Type 2 Regular Expression: [0-9]{3}\.?[0-9]{2}\.?[0-9]{3}\.?[0-9]{3} |
 |
Specify the matching element and supporting elements
Type 1 Keywords: AHV, AVS, Social, Sozial, Versicherung, Sozialversicherung, Sozialversicherungsnummer, AHV-Nr Type 2 Keywords: AHV, AVS, Social, Sozial, Versicherung, Sozialversicherung, Sozialversicherungsnummer, AHV-Nr Keep in mind, that these keywords have to 100% match in your documents. So, feel free to add additional key words to the list. Click next and then Finish on the review screen. |
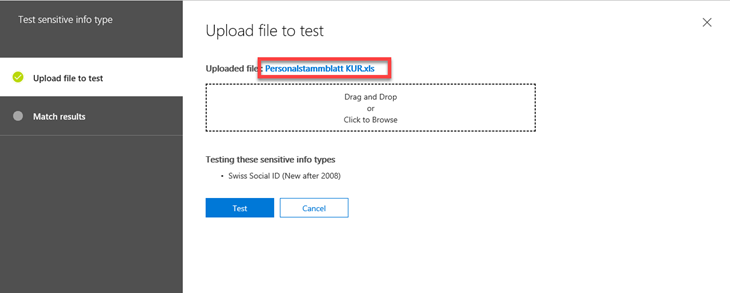 |
Now we can test the sensitive info type by uploading test documents. I do it by uploading my own personal data sheet. |
 |
As you can see If there is anything sensitive in the document, it will show you the match like in my case including the supporting element. |
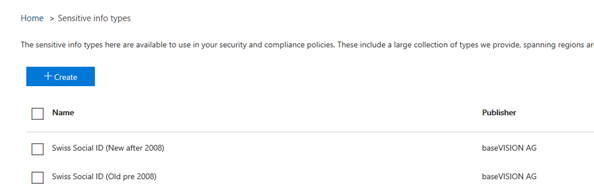 |
At the end the two types should be displayed in the list. |
Create DLP policy
 |
The next step to identify if sensitive data is shared with external people. This can be done with a DLP policy.
Go to Data Loss prevention à Policy à Create a policy |
 |
Choose to create custom policy and on the next screen specify a name for it. |
 |
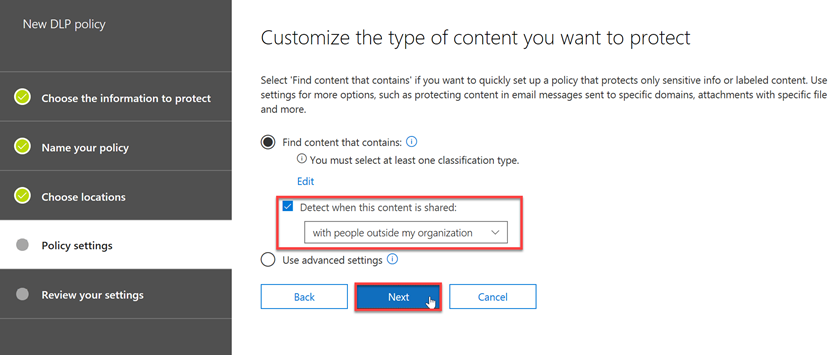
In my case I would like to get notified regardless of the location of the sensitive information. Therefore, I choose the first option. Otherwise you can customize this by selecting option 2. |
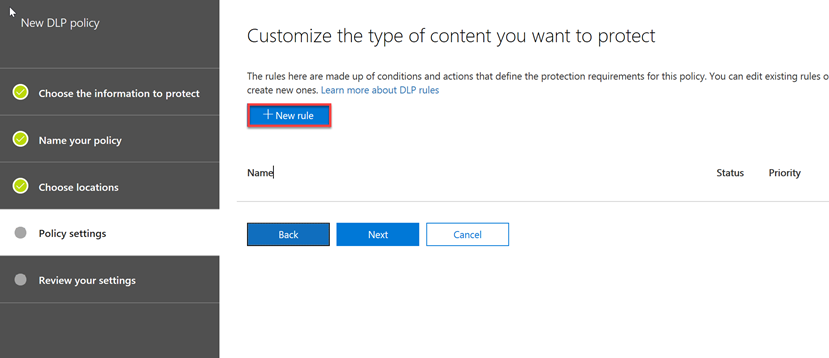 |
On this page we can start creating the rule. Click on New rule to begin. |
 |
In the condition section add the check for “Content contains” which allows to add your newly created Swiss social ID’s. |
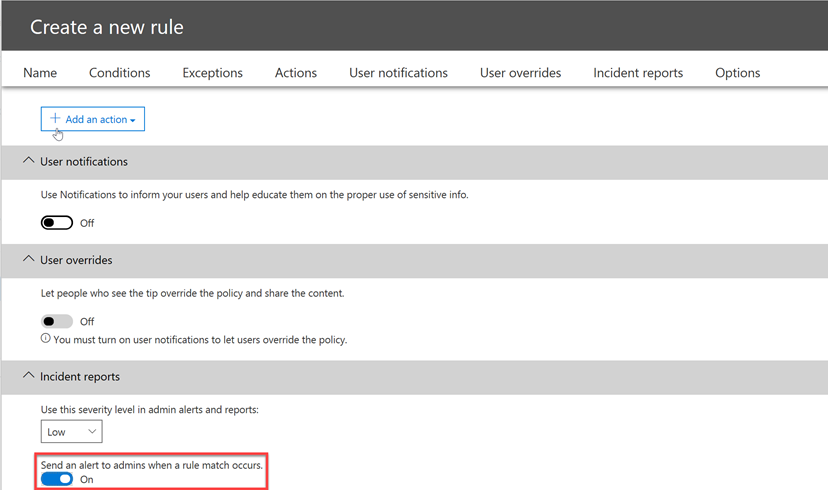 |
Then we can define what should happen on detection. In my case I’m happy if I get a notification about such cases. If you are in a bigger company probably you would like to send the message also to the end user. But in my opinion the messages aren’t too user friendly as you can see below. |
 |
The next step is to define which action should trigger the alert. In our case it’s as soon it’s shared with someone outside of our organization. With a click on next you will see the review screen and can finish the configuration. |
That are the only steps you have to take care of. Now your environment is constantly monitored.
Result
As mentioned at the beginning, the best thing was that after one day I already had the first alert. This time it was good action, but I saw that the DLP policy works and monitors our data.
- Microsoft Sentinel ASIM Parser demystified - March 31, 2024
- Enhancing Network Security Insights with IDS/IPS of Ubiquiti Dream Machine Pro and Microsoft Sentinel - March 10, 2024
- Ubiquiti Dream Machine Pro Logs to Microsoft Sentinel - February 6, 2024

1 Comment
Hazel · March 17, 2019 at 12:50
fantastic points altogether, you simply won a brand new reader.
What may you recommend about your put up that you just made a few days ago?
Any positive?